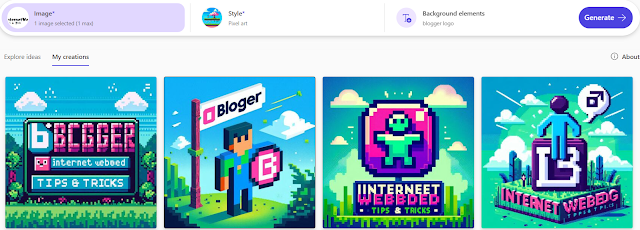
Artificial intelligence (AI) has transformed many industries, and design is no exception. Microsoft Designer, available at designer.microsoft.com, allows users to generate high-quality images using AI-powered tools. Whether you're a professional designer or a beginner, this tool simplifies the process of creating visually appealing designs with just a few clicks. In this guide, we’ll walk you through the steps to create an AI-generated image using Microsoft Designer.
What is Microsoft Designer?
Microsoft Designer is a powerful online tool that leverages AI to assist users in designing stunning images, whether it’s for presentations, social media, or marketing purposes. Its intuitive interface makes it easy to use, and the AI-based suggestions help you customize designs to suit your needs.
Step-by-Step Guide: How to Create an AI Image in Microsoft Designer
Follow these simple steps to create your own AI-generated image:
Step 1: Visit the Microsoft Designer Website
To get started, head over to the Microsoft Designer website. If you don’t already have an account, you can sign up with your Microsoft account. Once logged in, you'll be taken to the main dashboard.
Step 2: Start a New Design
Click on the "New Design" button to begin creating a new project. You will be prompted to either select a template or start from scratch. If you prefer to have more control over your design, choose the “Start from scratch” option.
Step 3: Select an Image
Once you're in the design editor, it's time to add an image.
- Click on the "Image" option located on the left toolbar.
- You will have the option to upload your own image or select from AI-generated image suggestions.
- If you want the AI to generate an image for you, enter a description of the image you want (e.g., "sunset over a beach" or "mountain landscape with a lake"). The AI will use your input to generate a relevant image.
- Click on the generated image you want to use, and it will be added to your canvas.
Step 4: Choose a Style
Next, you can select a style that matches the mood and theme of your design.
- In the right-hand menu, you'll see the "Style" options. These presets allow you to apply filters, color schemes, and design styles that complement your image.
- Explore various styles, from minimalist to vibrant and bold, until you find one that fits your vision.
- Click on the desired style, and it will automatically be applied to your image.
Step 5: Add Elements
To make your design stand out, you can add additional elements like shapes, icons, or text.
- Click on the "Elements" option from the left toolbar. You’ll see a selection of shapes, icons, and design elements that can enhance your image.
- Drag and drop your preferred elements onto your canvas and adjust their size, position, and color.
- You can layer these elements to create a more dynamic design.
Step 6: Generate Your Image
Once you're satisfied with the image, click the "Generate" button at the top of the screen. The AI will finalize your design, incorporating all the elements, styles, and effects you’ve selected.

Step 7: Download or Share Your Image
After your image is generated, you can either download it or share it directly from the platform. Microsoft Designer allows you to download the image in various formats, such as PNG or JPG, for different purposes.
Conclusion
Creating an AI-generated image with Microsoft Designer is a simple and efficient process. Whether you're designing for personal use or professional projects, the tool provides a wide range of options that cater to all skill levels. With just a few clicks, you can go from a blank canvas to a fully designed, visually stunning image. Try it out today at designer.microsoft.com and elevate your creative projects with the power of AI.
Call to Action
Have you tried creating an AI-generated image with Microsoft Designer yet? Share your creations and let us know how this tool has helped boost your creativity!

.jpeg)


0 $type={blogger}:
Post a Comment