Archive: 2024

How to Fix the "msvcr71.dll Not Found" Issue on Windows 11

If you’ve encountered the dreaded "msvcr71.dll not found" error while launching an application on your Windows 11 machine, you’re not alone. This error often occurs because a critical runtime file, msvcr71.dll, is missing or not in the expected location. In this blog post, we’ll walk you through a straightforward solution that resolved this issue for me on Windows 11.

msvcr71.dll not found

What Is msvcr71.dl?

msvcr71.dll is part of the Microsoft Visual C++ Runtime Library and is used by many older applications to perform standard C library functions. As software evolves, older runtime files like msvcr71.dll may no longer be included in modern systems, leading to errors when trying to run legacy applications.

Symptoms of the Issue

When the issue occurs, you might see an error message like:

  • "The program can't start because msvcr71.dll is missing from your computer."

  • "msvcr71.dll was not found. Reinstalling the application may fix this problem."


The Solution

After much troubleshooting, the solution turned out to be surprisingly simple: copying the required DLL files into specific directories. Here’s how I fixed the issue on my Windows 11 machine:

Step 1: Obtain msvcr71.dll and msvcp71.dll(this file if needed)

First, you’ll need a legitimate copy of the missing files:

  • If you have access to a working installation of the application on another system, copy the msvcr71.dll and msvcp71.dll files from there.

  • Alternatively, these files may be included in the application installer package or on the developer’s support website.

Important: Avoid downloading DLL files from untrusted third-party websites, as they may contain malware.

Step 2: Locate the Application’s Installer Folder

Identify the folder where the application is installed. Typically, this is under one of the following paths:

  • C:\Program Files\<Application Name>

  • C:\Program Files (x86)\<Application Name> (for 32-bit applications)

Step 3: Locate the Application’s Common Files Folder

Some applications also store additional files in a Common Files directory. For example:

  • C:\Program Files\Common Files\<Application Vendor>

  • C:\Program Files (x86)\Common Files\<Application Vendor>

In my case, extra application files were residing in a Common Files folder.

Step 4: Copy the DLL Files

  • Copy msvcr71.dll into the application’s installation folder.

  • Additionally, copy msvcp71.dll into the Common Files directory where additional application files are stored.

Step 5: Relaunch the Application

After copying the files, restart your application. It should now work without throwing the missing DLL error.


Why This Fix Works

Windows applications typically search for required DLLs in specific locations:

  1. The application’s installation folder.

  2. System directories like C:\Windows\System32 or C:\Windows\SysWOW64.

  3. Common Files directories if specified by the application.

By placing the DLLs in the application’s folder and its related directories, you ensure the application can locate and load these dependencies.


Troubleshooting Tips

If the issue persists:

  1. Check Permissions: Ensure you have administrative privileges to copy files into the required directories.

  2. Run as Administrator: Launch the application as an administrator to rule out permission issues.

  3. Verify the DLL Version: Ensure the msvcr71.dll and msvcp71.dll files match the version required by the application.

  4. Use Compatibility Mode: For very old applications, right-click the application executable, go to Properties > Compatibility, and enable compatibility mode for an older version of Windows (e.g., Windows 7).


Conclusion

The "msvcr71.dll not found" issue can be frustrating, especially when it prevents critical applications from running. By placing the required DLLs in the correct directories—the application folder and the Common Files folder—I was able to resolve this issue on my Windows 11 machine.

If you’re facing this problem, give this method a try, and feel free to share your experience or any additional tips in the comments below!

Exposing Google Maps 5-Star Rating Scam: How Scammers Exploit Trust

Scammer_Pic

Beware of the Latest Google Maps 5-Star Rating Scam

In an era where online scams are becoming increasingly sophisticated, a new scheme has emerged, targeting unsuspecting individuals through Google Maps reviews. This scam not only preys on people's trust but also exploits the allure of easy money. Here’s how it works and how you can protect yourself.


How the Scam Operates

  1. Initial Contact via WhatsApp: The scam begins with a message on WhatsApp from someone posing as a representative of a legitimate company. They introduce themselves with what appears to be a genuine identity, complete with a business name and professional tone. 

    scammer_on_whatsapp

  2. The Tempting Offer: They claim to promote their business and offer you a quick and easy way to earn money. All you need to do is leave a 5-star rating for a specific location on Google Maps. In exchange, they promise to pay you ₹200 instantly.

    sammer_payment

  3. Building Trust: Once you agree, they send you a list of places to review. They guide you to search for these locations on Google Maps and leave glowing reviews. True to their word, they transfer ₹200 to your account, solidifying your trust in them.

  4. Transition to Telegram: After gaining your trust, they introduce you to their "manager" and provide a fake employee ID to make the operation seem credible. You’re then asked to contact this manager via a Telegram ID.

  5. The Telegram Channel and Application: The manager adds you to a Telegram channel where other participants share their successes, creating a false sense of legitimacy. You’re told to complete a set of 20 tasks, which now involve downloading an app and making small investments to "earn" more money.

    fake_application

  6. The Big Trap: The tasks escalate, requiring increasingly larger investments. By the time victims realize something is amiss, they may have already poured substantial amounts of money into the scam. Eventually, the scammers disappear, leaving victims with significant financial losses.


Why This Scam Works

  • Trust-Building: By initially delivering on their promise of paying for reviews, scammers establish credibility.

  • Social Proof: Telegram channels filled with fake participants and success stories make the scam appear legitimate.

  • Gradual Escalation: The scam starts with small, harmless actions (writing reviews) and escalates to significant investments.

    scammer_exposed


How to Protect Yourself

  1. Be Skeptical of Easy Money: Offers that sound too good to be true usually are. Legitimate businesses don’t pay people to leave fake reviews.

  2. Verify Identities: Always verify the identity of people contacting you, especially when they claim to represent a business. Look up the company independently and confirm their association with the individual.

  3. Avoid Sharing Personal Information: Refrain from sharing sensitive details or installing unknown apps on your device.

  4. Report Suspicious Activity: If you suspect a scam, report it to the relevant authorities and platforms (e.g., Google, Telegram, or WhatsApp).

  5. Educate Others: Spread awareness about this scam to prevent others from falling victim.


Conclusion

The Google Maps 5-star rating scam is a stark reminder of how scammers adapt to exploit digital platforms. While the promise of easy money can be tempting, staying vigilant and cautious is crucial. Always remember: if something seems too good to be true, it probably is. Protect yourself and help others by sharing this information widely.

How to Create an AI Image Using Microsoft Designer

sample AI image

Artificial intelligence (AI) has transformed many industries, and design is no exception. Microsoft Designer, available at designer.microsoft.com, allows users to generate high-quality images using AI-powered tools. Whether you're a professional designer or a beginner, this tool simplifies the process of creating visually appealing designs with just a few clicks. In this guide, we’ll walk you through the steps to create an AI-generated image using Microsoft Designer.

What is Microsoft Designer?

Microsoft Designer is a powerful online tool that leverages AI to assist users in designing stunning images, whether it’s for presentations, social media, or marketing purposes. Its intuitive interface makes it easy to use, and the AI-based suggestions help you customize designs to suit your needs.

Step-by-Step Guide: How to Create an AI Image in Microsoft Designer

Follow these simple steps to create your own AI-generated image:

Step 1: Visit the Microsoft Designer Website

To get started, head over to the Microsoft Designer website. If you don’t already have an account, you can sign up with your Microsoft account. Once logged in, you'll be taken to the main dashboard.

Step 2: Start a New Design

Click on the "New Design" button to begin creating a new project. You will be prompted to either select a template or start from scratch. If you prefer to have more control over your design, choose the “Start from scratch” option.

Step 3: Select an Image

Once you're in the design editor, it's time to add an image.

  1. Click on the "Image" option located on the left toolbar.
  2. You will have the option to upload your own image or select from AI-generated image suggestions.
  3. If you want the AI to generate an image for you, enter a description of the image you want (e.g., "sunset over a beach" or "mountain landscape with a lake"). The AI will use your input to generate a relevant image.
  4. Click on the generated image you want to use, and it will be added to your canvas.
Image selection option


selecting an image

Step 4: Choose a Style

Next, you can select a style that matches the mood and theme of your design.

  1. In the right-hand menu, you'll see the "Style" options. These presets allow you to apply filters, color schemes, and design styles that complement your image.
  2. Explore various styles, from minimalist to vibrant and bold, until you find one that fits your vision.
  3. Click on the desired style, and it will automatically be applied to your image.

style selection


Step 5: Add Elements

To make your design stand out, you can add additional elements like shapes, icons, or text.

  1. Click on the "Elements" option from the left toolbar. You’ll see a selection of shapes, icons, and design elements that can enhance your image.
  2. Drag and drop your preferred elements onto your canvas and adjust their size, position, and color.
  3. You can layer these elements to create a more dynamic design.

Element selection

Step 6: Generate Your Image

Once you're satisfied with the image, click the "Generate" button at the top of the screen. The AI will finalize your design, incorporating all the elements, styles, and effects you’ve selected.

view a generated image

Step 7: Download or Share Your Image

After your image is generated, you can either download it or share it directly from the platform. Microsoft Designer allows you to download the image in various formats, such as PNG or JPG, for different purposes.

Conclusion

Creating an AI-generated image with Microsoft Designer is a simple and efficient process. Whether you're designing for personal use or professional projects, the tool provides a wide range of options that cater to all skill levels. With just a few clicks, you can go from a blank canvas to a fully designed, visually stunning image. Try it out today at designer.microsoft.com and elevate your creative projects with the power of AI.

Call to Action

Have you tried creating an AI-generated image with Microsoft Designer yet? Share your creations and let us know how this tool has helped boost your creativity!

The AI Boom: How Generative AI is Transforming Content Creation

 Introduction

The rise of artificial intelligence (AI) has been one of the most significant technological advancements of the 21st century. Among the various branches of AI, generative AI is making waves, particularly in the realm of content creation. Whether it's writing articles, generating images, or creating music, generative AI is reshaping the creative industry. This article delves into the impact of generative AI on content creation and what it means for the future.

What is Generative AI?

Gen AI Image

Generative AI refers to a subset of artificial intelligence that focuses on creating new content based on patterns and data it has been trained on. Unlike traditional AI, which typically follows predefined rules, generative AI uses deep learning models, such as GPT (Generative Pre-trained Transformer) and DALL-E, to produce text, images, and other types of content that mimic human creativity.

How Generative AI is Transforming Content Creation

  1. Automated Writing: Tools like ChatGPT are revolutionizing the way content is produced. From generating blog posts to writing scripts for videos, these AI models can produce high-quality text content quickly and efficiently. This is particularly useful for businesses and content creators who need to produce a large volume of content on a regular basis.

  2. Art and Design: Generative AI isn't just limited to text. Models like DALL-E can create stunning images based on textual descriptions. This has opened up new possibilities in fields like graphic design, advertising, and even fine arts. Artists can now collaborate with AI to generate unique pieces of art, combining human creativity with machine precision.

  3. Music Composition: AI is also making strides in music. Tools like OpenAI's MuseNet can compose music in various styles, from classical to pop, offering composers and musicians new ways to experiment and create.

  4. Video Creation: Generative AI is being used to create video content, from deepfake technology that can superimpose faces onto different bodies to AI-driven animation tools that generate visuals based on scripts. This technology is set to transform the film and entertainment industry, making it easier to produce high-quality video content at a fraction of the cost.

Implications for the Future

The rise of generative AI in content creation brings with it a mix of excitement and concern. On the one hand, it democratizes creativity, allowing anyone with a computer to produce professional-grade content. On the other hand, it raises questions about the future of jobs in creative industries. Will AI replace human creators, or will it become a tool that enhances human creativity?

Furthermore, the ethical implications of AI-generated content cannot be ignored. Issues such as copyright infringement, the spread of misinformation, and the authenticity of AI-generated works are becoming increasingly relevant as this technology evolves.

Conclusion

Generative AI is at the forefront of the next wave of technological innovation. Its ability to create content that is indistinguishable from that produced by humans is both thrilling and challenging. As we move forward, the key will be to find a balance between leveraging the power of AI and preserving the unique qualities of human creativity.

Call to Action

As generative AI continues to develop, it's essential to stay informed about its capabilities and implications. Subscribe to this blog to keep up with the latest trends and insights in AI and technology. The future is now—let's explore it together!

The Rise of Quantum Computing: How It Will Revolutionize Technology

 Introduction

In recent years, quantum computing has shifted from a theoretical concept to a burgeoning reality. With tech giants like IBM, Google, and Microsoft heavily investing in quantum research, the question is no longer "if" quantum computing will change the world, but "when." This article explores what quantum computing is, why it's revolutionary, and how it will impact various industries.

AI_Image


What is Quantum Computing?

Quantum computing is a new paradigm that leverages the principles of quantum mechanics to process information. Unlike classical computers that use bits as the smallest unit of data, quantum computers use quantum bits or qubits. Qubits can exist in multiple states simultaneously, thanks to quantum superposition, and can also be entangled, allowing for faster and more complex computations.

Why Quantum Computing is Revolutionary

  1. Exponential Speed-Up: Quantum computers can solve certain problems exponentially faster than classical computers. For example, breaking encryption, which would take classical computers millions of years, could be done in minutes by a quantum computer.

  2. Complex Problem Solving: Quantum computers excel at solving complex problems, such as simulating molecular structures for drug discovery or optimizing large systems like global supply chains.

  3. Advancements in AI: Quantum computing could accelerate advancements in artificial intelligence by improving machine learning algorithms, enabling more accurate predictions and smarter AI systems.

Impact on Various Industries

  1. Healthcare: Quantum computing can revolutionize drug discovery by simulating interactions between molecules and potential drugs, reducing the time and cost of bringing new medications to market.

  2. Finance: Financial institutions can use quantum computers to optimize portfolios, manage risk, and detect fraudulent transactions with unprecedented accuracy.

  3. Cybersecurity: While quantum computing poses a threat to current encryption methods, it also offers the potential for quantum encryption, which could provide unbreakable security for communications.

  4. Logistics and Manufacturing: Companies could use quantum computing to optimize supply chains, reduce waste, and improve production efficiency, leading to significant cost savings.

Challenges and the Road Ahead

Despite its promise, quantum computing is still in its infancy. The technology faces significant challenges, including qubit stability, error rates, and the need for extremely low temperatures to operate. Moreover, developing quantum algorithms that can outperform classical ones is a complex task.

However, with continuous research and development, these challenges are likely to be overcome in the coming years. Governments and private sectors worldwide are investing billions in quantum research, pushing the boundaries of what’s possible.

Conclusion

Quantum computing represents the next frontier in technology. Its potential to solve complex problems and revolutionize industries is immense. As we stand on the brink of the quantum era, staying informed about these developments will be crucial for businesses and individuals alike.

Call to Action

Stay tuned to this blog for more updates on quantum computing and other cutting-edge technologies. Let’s explore the future of tech together!

Fix MSI Error 1612: Resolving "Network resource that is unavailable"

If you’ve ever dealt with MSI (Microsoft Installer) errors, you know how frustrating they can be, especially when you encounter Error 1612. This error typically indicates that the installation source for the product is unavailable. It often appears with the message: "The feature you are trying to use is on a network resource that is unavailable." This blog post will walk you through a PowerShell script I’ve developed to fix this issue.

The network resource is unavailable

MSI Error 1612

Understanding MSI Error 1612

MSI Error 1612 usually occurs when the Windows Installer cannot find the installation source of a program. This can happen for several reasons:

  • The installation files have been moved or deleted.
  • The network location where the installation files reside is unavailable.
  • Incorrect registry entries that point to the wrong location.


The PowerShell Solution

To address MSI Error 1612, I developed a PowerShell script that automates the process of fixing the underlying issues. This script is hosted on GitHub and can be accessed here.

The script performs the following actions:

  1. Create the log file: It generated the MSI log during uninstallation.
  2. Get exact uninstallation path from log file: Captures the network path or local path where the msiexec is looking for the uninstall file.
  3. Tweak the uninstall with local MSI file: Using the file placed locally along with script, the script will tweak it to perform the uninstallation.


How to Use the Script

  1. Open README.md file: First, visit the GitHub repository and open readme.md file. 

  2. Follow the procedure as per mentioned in readme.md file

Share your feedback/queries on the github or comment here.


Reduce Your Electricity Bill: Smart Plug Automation for Your AC {2024}

Electricity Down logo


In today's world, reducing electricity consumption is not only about saving money but also about contributing to environmental sustainability. One significant way to cut down on electricity bills is by optimizing the usage of heavy electronic devices, such as air conditioners (AC). With the advent of smart home technology, automating your AC's operation using smart plugs can result in substantial savings. Here’s how you can do it.
Why Use a Smart Plug?
Smart plugs are an excellent tool for automating and controlling various home appliances. They can help you schedule on/off times, monitor energy usage, and remotely control your devices through a smartphone app. By integrating a smart plug with your AC, you can ensure it runs only when necessary, significantly reducing your electricity consumption.

Step-by-Step Guide to Automate Your AC with a Smart Plug

1. Choose the Right Smart Plug
First, purchase a reliable smart plug compatible with your AC. Brands like Wipro offer smart plugs that are easy to set up and come with user-friendly apps. Ensure the smart plug can handle the power load of your AC unit.

2. Install the Smart Plug
Follow these steps to install your smart plug:

Plug the smart plug into a power outlet.
Connect your AC unit to the smart plug.
Download the corresponding smart plug app from the App Store or Google Play Store.

3. Set Up the Smart Plug App

Once the app is installed:
Open the app and follow the instructions to connect the smart plug to your Wi-Fi network.
Name the smart plug for easy identification (e.g., "Bedroom AC").
4. Configure the Schedule
To maximize savings, set a schedule for your AC to run during the night. Here’s an optimal schedule:

Start the AC at 11 PM.
Set it to turn off after 1 hour.
Turn it back on after 30 minutes.
Repeat this cycle until 7 AM.

Most smart plug apps have a timer or scheduling feature. Here’s how to set it up:

Go to the scheduling section in the app.
Use the circulate timer to set the smart plug ON for 1 hour and then OFF for 30 min.
Set the smart plug to get active from 11 PM.
Set it to be inactive at 7 AM.

Doing this your smart plug will be active between 11pm-7am and will automatically be ON for 01 hr and OFF for 30 min. Ex. AC is connected to smart plug, then AC unit will be turned on at 11pm and turned OFF at 12:00 AM then it will start automatically at 12.30AM nd turn OFF at 01:00 AM and so on.

This schedule ensures your room stays cool throughout the night without the AC running continuously, thereby reducing energy consumption.

5. Monitor and Adjust
After setting up the schedule, monitor the performance and comfort level for a few nights. Adjust the timing as needed to ensure both comfort and energy efficiency.

Benefits of Using a Smart Plug with Your AC

Cost Savings: By reducing the run time of your AC, you’ll see a noticeable drop in your electricity bill.
Energy Efficiency: Smart scheduling ensures your AC runs only when necessary, reducing wasted energy.
Convenience: Control your AC remotely and adjust settings on the go using your smartphone.
Environmental Impact: Lower energy consumption translates to a smaller carbon footprint, contributing to environmental conservation.

Conclusion
Integrating a smart plug with your AC is a simple yet effective way to cut down on electricity costs and enhance energy efficiency. With a small investment and a bit of setup, you can enjoy a comfortable home environment while being mindful of your energy usage. Embrace smart home technology and take a step towards a greener, more cost-effective future.

By following these steps, you'll be well on your way to reducing your electricity bill and making your home smarter and more energy-efficient. Happy saving!

Resolving the Microsoft.VC90.MFC Installation Error on Windows

Resolving the Microsoft.VC90.MFC Installation Error on Windows


Are you encountering the frustrating error message "An error occurred during the installation of assembly Microsoft.VC90.MFC..." while trying to install a Windows application? Fear not, as there's a simple fix that might just save the day!
Recently, many users have reported facing this issue, which often halts the installation process of various applications. The error message typically reads: "An error occurred during the installation of assembly Microsoft.VC90.MFC, version='9.0.30729.4148', publicKeyToken='1fc8b3b9a1e18e3b', processorArchitecture='amd64', type='win32'. Please refer to Help and Support for more information."

The root cause of this problem lies in the Windows Module Installer service, which is responsible for installing, modifying, and removing system components and Windows updates. For some reason, this service might be disabled or not running on your system, causing the installation error.

But fret not, as the solution is straightforward:

1. **Accessing the Services Management Console**: To enable and start the Windows Module Installer service, you'll need to access the Services Management Console. You can do this by pressing the Windows key + R to open the Run dialog, then typing "services.msc" and hitting Enter.

2. **Enabling the Service**: In the Services Management Console, scroll down to find the "Windows Module Installer" service. Right-click on it and select "Properties" from the context menu. In the Properties window, under the "General" tab, set the "Startup type" to "Automatic" from the drop-down menu. This ensures that the service starts automatically with Windows.

3. **Starting the Service**: After setting the startup type to Automatic, click on the "Start" button in the Properties window to immediately start the service. You should see a confirmation message indicating that the service has started successfully.

4. **Restart and Install**: Once the Windows Module Installer service is enabled and running, you may need to restart your computer to apply the changes. After the restart, try installing the application again. You should now be able to proceed with the installation without encountering the dreaded Microsoft.VC90.MFC error.

By following these simple steps, you can quickly overcome the obstacle posed by the installation error and get back to installing your favorite Windows applications hassle-free.

Remember, while technical glitches like these can be frustrating, there's usually a simple solution waiting to be discovered. With a bit of troubleshooting and perseverance, you can tackle even the most stubborn of errors. Happy installing!

How to Install ClickOnce Application Silently

How to Install ClickOnce Application Silently
command windows

ClickOnce is a powerful deployment technology that allows users to install and run applications with minimal user interaction. However, there are scenarios where you may need to install a ClickOnce application silently mainly when deploying in an organization with thousand's of machines using SCCM or other tools, without user prompts or confirmations. Fortunately, this can be achieved using a tool called ClickOnceSilentInstall.exe. In this blog post, we'll walk you through the steps to silently install a ClickOnce application using this tool.

What is ClickOnce?

ClickOnce is a Microsoft technology that simplifies the deployment of Windows-based applications. It allows applications to be installed and run with a single click from a web page, network share, or other deployment methods. One of its key features is the automatic update mechanism, which ensures that the application is always up to date.

Why Silent Installation?

Silent installation is beneficial in various scenarios, such as:

  • Enterprise Deployments: IT administrators can deploy applications across multiple machines without interrupting users.
  • Automated Setup Scripts: Silent installations can be part of automated setup scripts for setting up environments quickly.
  • User Experience: Avoiding multiple prompts and dialogs can lead to a smoother user experience.

Prerequisites

Before proceeding, ensure you have the following:

  1. The ClickOnce application deployment URL or the .application file path.
  2. ClickOnceSilentInstall.exe – This is the utility that enables silent installation. Link: Download ClickOnceSilentInstaller

Steps to Install ClickOnce Application Silently

Follow these steps to install a ClickOnce application silently using ClickOnceSilentInstall.exe:

Step 1: Download ClickOnceSilentInstall.exe

First, download ClickOnceSilentInstall.exe from a trusted source. Ensure the version you download is compatible with your environment and the ClickOnce application you intend to install.

Step 2: Prepare the ClickOnce Application URL

You need the deployment URL of the ClickOnce application or the path to the .application file. This URL is typically provided by the application vendor or can be found on the application’s download page.

Step 3: Execute the Silent Installation

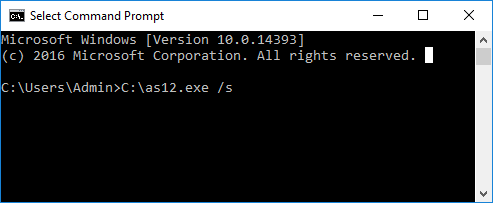
Open a Command Prompt window with administrative privileges and navigate to the directory where ClickOnceSilentInstall.exe is located. Run the following command:

ClickOnceSilentInstall.exe "<ClickOnce_Application_URL>"

Replace <ClickOnce_Application_URL> with the actual URL of the ClickOnce application. For example:

ClickOnceSilentInstall.exe "http://example.com/MyApp.application"

Step 4: Verify Installation

After running the command, the ClickOnce application should install silently in the background. To verify the installation, you can check the Start menu or the installation directory specified by the ClickOnce deployment or search in the add or remove programs under control panel.

Advanced Options

ClickOnceSilentInstall.exe may support additional parameters for more advanced installation scenarios. Refer to the documentation provided with the tool for details on options such as logging, custom installation paths, and more. You can also use below command to get other install options:

clickoncesilentinstaller.exe /?

Conclusion

Silent installation of ClickOnce applications using ClickOnceSilentInstall.exe is a straightforward process that can greatly enhance deployment efficiency in various environments. Whether you're an IT administrator deploying applications across an organization or a developer setting up automated installation scripts, this method can save time and reduce user interruptions.

For any issues or further customization, consult the documentation of ClickOnceSilentInstall.exe or seek assistance from the application's support team. Happy silent installing!

By following these steps, you can streamline the deployment process and ensure a smooth, user-friendly experience. If you have any questions or run into issues, feel free to leave a comment below.

Explore Your Destination Before You Go

Are you planning a trip to a new destination? Want to get a sneak peek of the streets and landmarks before you even set foot there? Thanks to Google Street View, you can virtually explore your destination from the comfort of your own home. In this guide, we'll show you how to use Google Street View to quickly view places on Google Maps and make the most out of your trip planning experience.

What is Google Street View?

Google Street View is a feature of Google Maps that provides panoramic, street-level imagery of various locations around the world. With Street View, you can virtually walk down streets, explore neighborhoods, and even view the exteriors of buildings, giving you a sense of what it's like to be there in person.

Why Use Google Street View for Trip Planning?

Using Google Street View can be incredibly helpful when planning a trip for several reasons:

  1. Get Familiar with the Area: Street View allows you to familiarize yourself with the layout of the streets and neighborhoods in your destination. This can help you navigate more confidently once you arrive.

  2. Explore Points of Interest: You can use Street View to scout out points of interest such as restaurants, attractions, and landmarks. This can help you prioritize what you want to see and do during your trip.

  3. Assess Accessibility: Street View can also be useful for assessing the accessibility of your destination, such as identifying wheelchair ramps or stairs.

  4. Visualize Accommodations: If you've booked accommodation, you can use Street View to see what the surrounding area looks like and get a sense of the neighborhood vibe.

How to Use Google Street View for Trip Planning

  1. Search for Your Destination: Start by going to Google Maps (https://www.google.com/maps) and entering the name or address of your destination in the search bar. Or you can open google maps on your phone and search the destination accordingly.

  2. Pegman
    Enter Street View: Once you've found your destination on the map, look for the yellow "Pegman" icon in the bottom right corner of the screen. Click and drag the Pegman onto the map to enter Street View mode.

  3. Explore Your Destination: In Street View, you can navigate around by clicking and dragging the screen or using the arrow keys on your keyboard. Explore different streets and landmarks to get a feel for the area.

    Street view on google using pegman

  4. Zoom In and Out: Use the zoom controls or your mouse scroll wheel to zoom in for a closer look at buildings and attractions. This can help you see details more clearly.

  5. Switch Between Views: You can switch between different Street View images by clicking on the arrows that appear on the screen. This allows you to explore different vantage points of the same location.

  6. Exit Street View: To exit Street View and return to the map, simply click on the "X" icon in the top left corner of the screen.

Tips for Using Google Street View Effectively

  • Use Fullscreen Mode: For a more immersive experience, click on the fullscreen icon in the bottom right corner of the Street View window.

  • Look for Blue Lines on the Map: Blue lines on the map indicate streets where Street View is available. Look for these lines when planning your route.

  • Explore Nearby Areas: Don't just focus on your destination; explore nearby areas and attractions as well to make the most of your trip.

Conclusion

Google Street View is a powerful tool for trip planning that allows you to explore your destination in detail before you even leave home. By following the tips in this guide, you can quickly view places on Google Maps using Street View and make informed decisions about your upcoming trip. So why wait? Start exploring your next destination today and get ready for an unforgettable adventure!